A Woodworker’s Guide to Knife Sharpening

I was supposed to be a carpenter. My father was a carpenter. His father— well, he owned a hammer, and building codes were pretty lax back in his day.
I picked up a lot of things from my old man. For one thing, I ended up being a halfway decent woodworker myself. I have a visceral, almost “fight or flight” reaction to out-of-plumb woodwork, which—here in two hundred year old Bostonian homes—means that I have never once relaxed, even for a moment. I’ve been known to shout at “DIY” show hosts in the same tone one might use to advise a horror movie protagonist against taking certain actions. I have yet to walk into a Home Depot without emerging in a Gollum-like fugue state, desperately clutching a new set of clamps that I absolutely do not need. I will, with little to no prompting, perform a full-throated exaltation of the works of Norm Abram.
Perhaps most of all, I inherited an almost pathological need to keep tools maintained. Leave a paintbrush partially washed around me and watch as I transform into a were-Dad, standing over the sink, carefully separating bristles and muttering about how you “wouldn’t throw a hammer away after using it; why wouldn’t you take care of a paintbrush the same way.” Lisa Maria keeps a blowgun loaded up with tranquilizer darts so she can bring me down before I can grow a mustache and start compulsively building a porch, in these situations. She has it trained on me right now, just in case I get carried away while I’m writing this.
For better or worse, I’ve carried this habit over into the kitchen. My cutting boards are well-oiled, my cookware is well-seasoned, and my knives are sharp. I came by that last part honestly, thanks to years of maintaining woodworking tools—and several generations worth of coaching on the subject.
Fix Up; Look Sharp
There are a couple of ways to determine whether a knife needs sharpening. Just “feeling” for sharp with the pad of your thumb isn’t the safest move in the world, for one thing—I’m not saying I haven’t done it, but I’m also not saying that the result hasn’t been “yes that is very sharp” hissed through my teeth while dashing for the medicine cabinet. So, in this as in so many other things: learn from my bad example.
Thing is, it isn’t super accurate either. A roughed-up edge can feel sharp in the way a serrated edge feels sharp. Here are a couple of more effective tests:
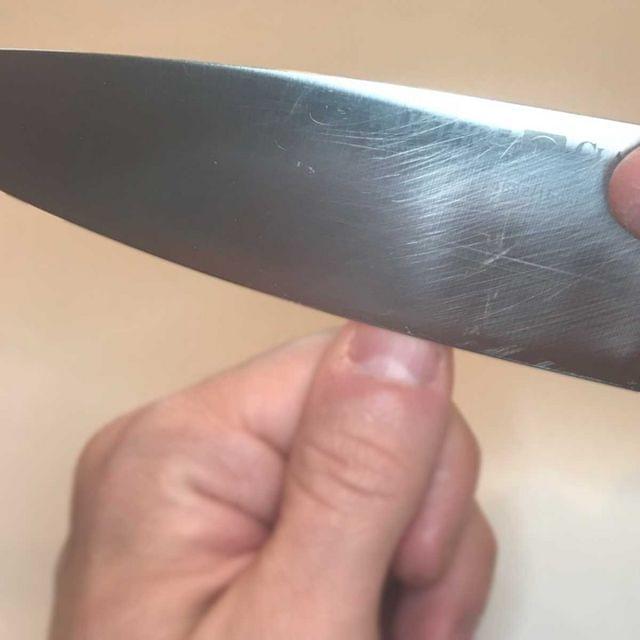
Instead of the extremely cut-able pad of your thumb, use your thumbnail: if you hold a knife at the angle of the edge and try to gently run it down your thumbnail, a sharp knife won’t move—the edge will catch, stopping it. A dull knife will slide. If you’re still feeling a little squeamish about it—a sound instinct, I say—or you don’t want to rough up your nails, I’ve read that you can do this test on a Sharpie. The plastic should catch the edge the same way.
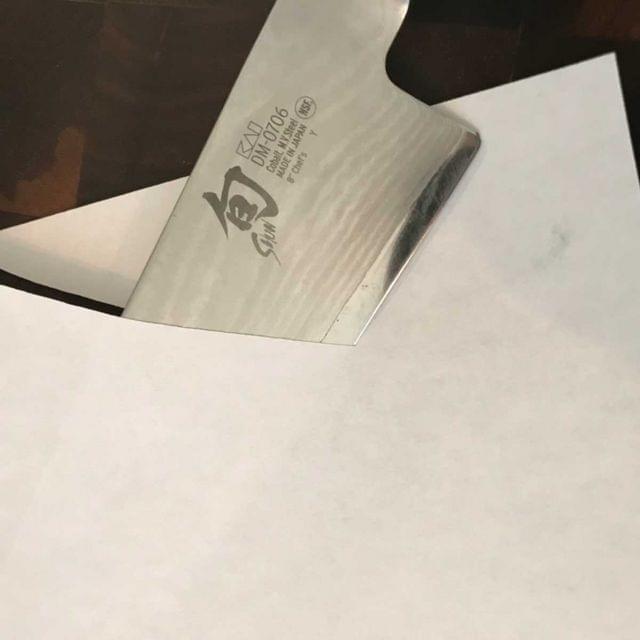
There’s the paper test, which is sort of a “look how sharp this is” cliché. It’s infomercial fodder for a reason: you can flub it pretty easily, whether or not you mean to. Depending on how you’re holding the paper, the pressure you’re using, the angle you’re cutting at, and so on, even a dullish knife can pull this off.
Now, I will cop to doing this anyway. I mean, it’s deeply satisfying to feel—and hear—a newly-sharpened edge glide through a sheet of paper, top to bottom, on only the knife’s own weight—like scissors gliding through wrapping paper, but moreso. Far be it from me to deny anyone that. Also, I tend to have a couple sheets of paper on hand while I’m sharpening my knives, for reasons we’ll discuss in a bit.

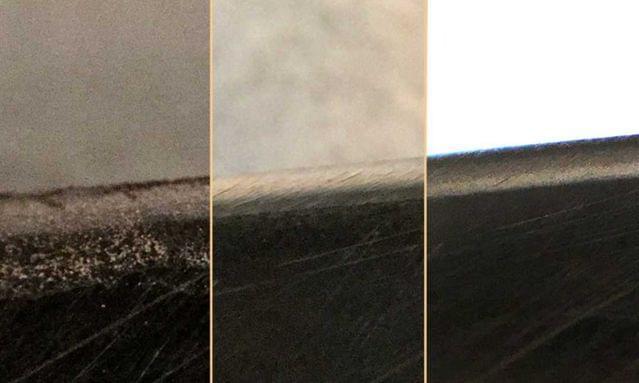
My go-to method for checking sharpness involves no props or appendages—just a light source. Look at the edge of the knife straight-on, with a bright light behind you. If the edge gleams, that means it’s thick enough to catch and reflect light. If it looks flat and dull, ironically enough, that means the edge is too fine to reflect any light.
You might need to move it around a bit in the light to see the effect, but once you know what to look for, you’ll be able to eyeball a knife for sharpness with a quick glance.
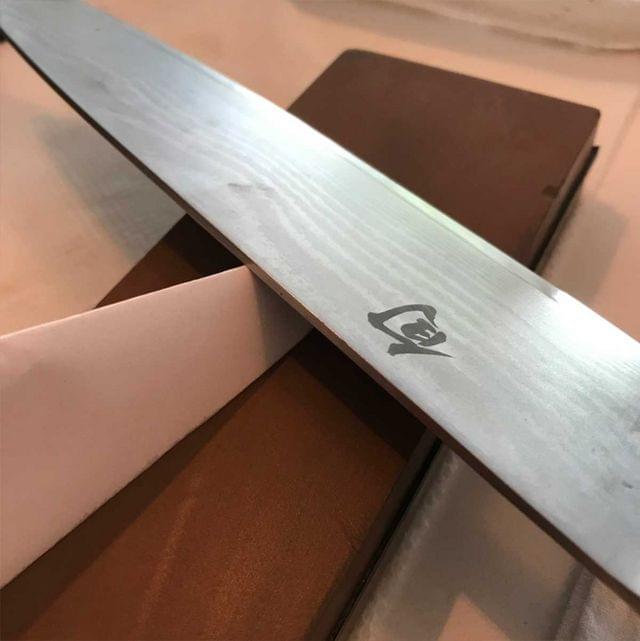
Sharpening with Waterstones
I use a set of mis-matched waterstones, inherited and accumulated over the years, with a range of grits—if you’re just starting out, you’ll probably want to buy a kit.
Before using them, Waterstones should be fully submerged and allowed to soak for at least half an hour. The water prevents them from being too aggressively abrasive. It also helps an abrasive slurry to form on the face of the stone while you’re using it, made up of loose grit from the stone and microscopic bits of metal—together, called “swarf.” Be sure to set a stone back in its own container of water while you’re not actively using it, so it doesn’t dry out on you.
I really only use two of my handful of stones, both double-sided: one is 1000/6000 grit, and the other is 800/4000 grit. Like sandpaper, “grit” refers to the coarseness of the waterstone—the lower the number, the more coarse the stone, and the rougher the edge it’ll put on your knife.
Lower grit stones are necessary for reshaping an edge, buffing out all the microscopic dings, scratches, rounded-over spots that cause dullness. Stopping there would still mean a dull knife, though—a low grit means we’ve reshaped the edge with a series of deep (on a microscopic level) scratches, like the edge of a saw. The edge is uniform, but not uniformly sharp. If a knife is in pretty serious need of sharpening, I’ll start with my 800 grit stone. If I’m just tuning-up a well maintained knife after a few months of use, I’ll start with my 1000 grit stone. I don’t need to remove a lot of material if the edge is already in pretty fair shape—using the 800 stone is only gonna make it less sharp, if uniformly so.
After fixing up the edge with a lower grit, I’ll move on to the 4000 grit to polish out the rough scratches left behind by the lower grit stones and refine the edge further, then a few strokes on the 6000 grit stone for razor-sharpness.
As the metal on the edge is scraped away, you’ll form something called a burr, a microscopic deformation of the metal at the very apex of the edge, which has become so thin that the motion and pressure of the sharpening process has deformed and curled the metal slightly. It’s a sign that everything has gone according to plan—you’ve taken away enough material that what remains at the very edge is so razor-thin that it bends, rather than being scraped away. As you move on to higher grits, the burr likewise becomes thinner and thinner, and the edge of your knife approaches “zero radius”—which is, quite literally, impossibly sharp.
A few things to keep in mind:
- Always clean the knife thoroughly and use clean water every time you move to a higher grit stone. If some of the coarser grit is left behind, and you run the knife over it while using the finer grit stone, you’re going to scratch the edge up all over again, and risk breaking or chipping your burr.
- Waterstones are soft. Until you get a solid feel for your sharpening angle, always pull the knife—away from the edge—rather than pushing the knife edge-first. Otherwise, if your angle is too steep, you’ll take a chunk out of the stone.
- Likewise, if you don’t buy a sharpening kit that includes one, be sure to get a waterstone flattener to maintain your stones themselves. They’ll wear unevenly and warp over time, making them far less effective—a flattener buffs the surface of the stones nice and flat again.
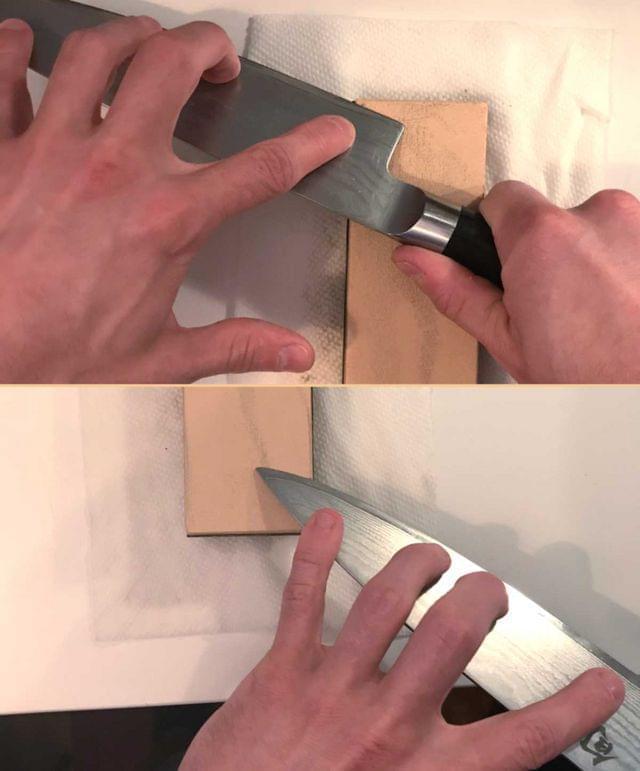
Maintain firm, even pressure across the blade, and drag the knife down the length of the stone, and across the width of the stone from heel to tip—starting at with the heel of the blade at the top left of the stone, and ending with the tip of the blade at the bottom right. Southpaws, other way around: heel to tip, from top right to bottom left.
Eventually, a burr will form. You can feel for it by scratching the opposite edge of the knife backwards against your thumbnail, at roughly the cutting angle—if it scratches or catches, that means you’ve formed a burr, and it’s time to move on to the other side.
This time, you’ll want to drag the knife the opposite way—going from the top right corner of the stone to the bottom left, heel to tip. Make an equal number of strokes on that side, move on to a finer grit stone, and repeat. It’ll get harder to feel the burr as the grit increases, so when in doubt, stick to that same number of strokes on each stone and on each side.
Angle of Attack
The “sharpening angle” is the angle formed by your knife and your sharpening stone—a knife with a sharpening angle of 20 degrees means you’ll be sharpening each side to 20 degrees, for a total angle of 40 degrees.
Now, for the sake of simplicity, I’m going to make a few assumptions here. Most western-style knives are double-beveled—meaning that the edge is symmetrical on both sides of the knife. I’m going to assume that’s what you’re working with. I’m also going to assume that the sharpening angle of your knife is somewhere between fifteen and twenty two degrees, because that’s a pretty safe assumption to make about chef’s knives in general. Thinner eastern knives are usually at the lower end of that scale and heavier western knives tend toward the higher end, but you’re not gonna see many general-purpose knives outside that range. The steeper the bevel, the sharper—and potentially, more fragile—the edge.
With practice, you’ll be able to find your sharpening angle naturally—a combination of muscle memory, feel, and even sound. You can buy fancy adjustable angle guides to help you feel it out, but you can make a rough one to help you find your angle. Fold a sheet of paper from corner to corner, and you’ll have a 45 degree angle. Fold it again, and you’ll have a 22.5 degree angle—close enough to a 20 degree western-style bevel to use it as a rough guide. Fold it one more time and you’ll have an 11.25 degree angle, close enough to an eastern-style bevel to use it as a rough guide. Obviously you can’t put any pressure on a folded paper, but you can use it to double-check and then finesse your sharpening angle while you get the hang of things.
Throw Your Electric Sharpener in the Garbage
—well, okay. Yeah, I have one: the Work Sharp Knife and Tool Sharpener. It’s a great little gadget, but not something I use as part of my usual sharpening routine. Electric sharpeners can take off a lot of material on each pass. Using one frequently can shorten the life of a knife, long term—and using one wrong can leave you with a rounded-off tip, or introduce peaks and valleys in the curve of the blade. They usually leave a really rough edge behind, too—you’d need to clean it up with a set of stones anyway. I use only use my electric sharpener when I have a knife to repair—when it’s so beaten-up and chipped that I need to put a brand new edge on it.
A Steel Doesn’t Sharpen, it Hones
Even with careful use of the knife, the very edge is going to warp and bend over time. Honing with a steel doesn’t (or at least, shouldn’t) really remove any material, just reshape what’s already there. A few strokes against a steel before using a knife will help straighten out the edge—restoring it to razor sharp, and lengthening the time before your next sharpening. Look for a relatively smooth honing steel; if it’s too aggressive, you risk chewing up the edge with it.
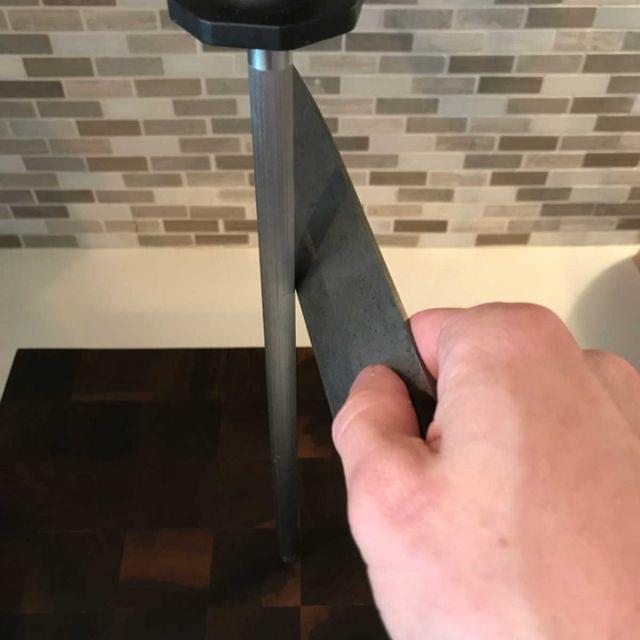
Make an even number of strokes with each side of the knife, since you’re straightening the edge. My usual pattern is three strokes on one side, three on the other, two, two, one, and one—it only takes a few seconds to do, and it’ll keep your knife in freshly-sharpened condition for a long time.
Listen. You’re probably not gonna be great at this, right out of the gate—honestly, there’s some chance you’re gonna chew up the edge of a knife the first time you try it. If I had to guess, though, you’ve got a beat-up knife of some sort kicking around—some old wobbly-handled thing from two apartments ago that you kept in a kitchen drawer, or a cheap pocketknife. Give it a shot, and I bet you’ll start getting a feel for it sooner than you think. It’s a skill well worth developing.
Worst case, take a crack at it the next time you’re planning to send your knives out to a professional sharpener anyway—you won’t do any damage they won’t be fixing anyway. Or, the next time you buy a new kitchen knife, keep your old knife to practice on. If you’re anything like me, you’ll end up using that fancy new knife less and less as you get the hang of maintaining your old one—no matter how old and beaten-up it might be otherwise.
See, there’s a flip side to nigh-obsessive tool maintenance. It’s an acceptance—even a sort of reverence—for the kind of wear-and-tear that we can’t control. Take a joinery mallet: it is, structurally speaking, a block of wood at the end of a stick. I’ve seen super fancy joinery mallets, sure—hell, the one I made myself is more than a little over-the-top—but it’s still just a dumb wooden club. I could keep it in pristine shape, of course—sand it down every time it gets a ding in the face, put a few coats of finish on it—but that wouldn’t make it work any better. I could stop using it altogether and save it from the ravages of time, but then it isn’t a joinery mallet anymore; just a block of wood on a stick, pristine and useless. As it becomes weathered and worn through years of use, even a dumb wooden club can come to feel like something deeply personal; an invisible component in everything one builds with it, and a visible marker of one’s own accumulated experience.
One of the less psychological things I inherited was a mismatched set of planes, all much older than I am. Almost all of their lacquer has flaked away through generations of use, exposing the dull iron underneath. The once oiled and polished rosewood handles have gone black from decades of exposure to light and general woodworking grime. The years have worn away the inessential. I could refurbish them, top to bottom, but it would just be for show.
Their blades, though—I keep those razor sharp, like my father did, and like his father did. Those planes have seen some shit and they’re no prettier for it, but with a little maintenance now and then, they leave behind a surface as smooth as glass—as good, or better, than they did fresh from the factory.
And speaking of which: if I should ever catch wind of you using your newly sharpened knives on a glass cutting board, so help me—and, Jesus, don’t put it in a drawer, where it’s just gonna rattle around with all manner of bric-a-brac—that’ll ruin the edge—and come to think of it when was the last time you had your oil changed and the air pressure in your tires checked because that will ruin your gas mileage and the price of gas these days is just ludicrous I mean when I was youn
sorry, i was late on that one
—lmm